
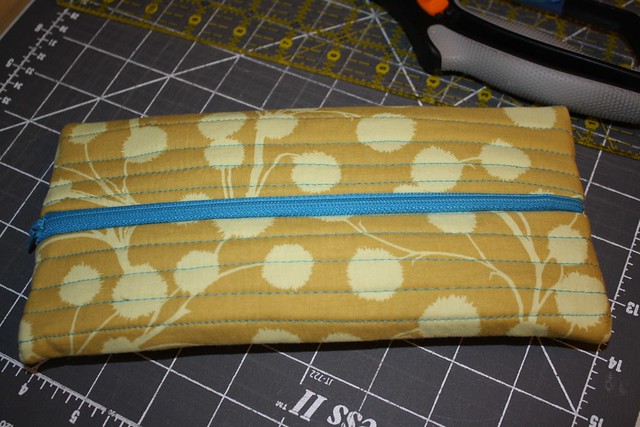
So here's my take on a quilted toiletries/pencil/whatever-you-like bag!
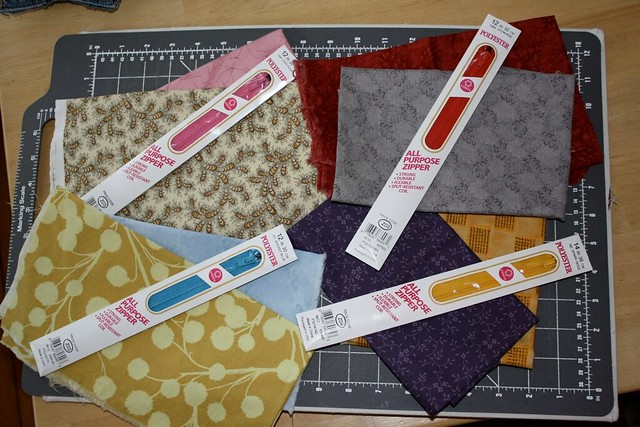
First step in a project, as in cooking, gather your "ingredients." In this case you will need your choice of fabric(s), a 12 inch zipper, and a padded layer (felt or quilt batting . . . I used the latter in order to get a puffier quilted look) for between your two fabric layers. I am going to make a few of these bags, and you can see my color choices above.
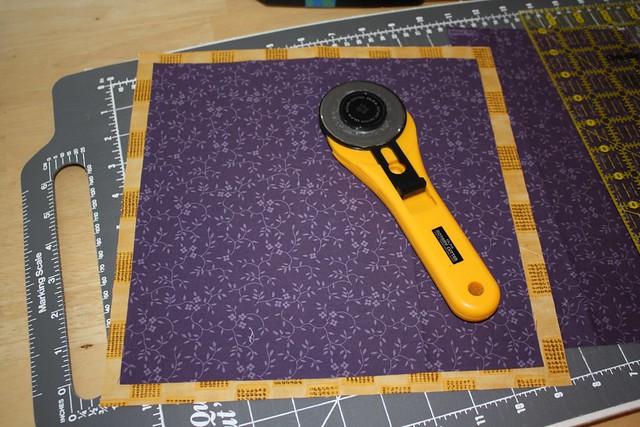
Next you are going to cut the outer fabric color (the one you will see all the time) into a 10-inch square. The lining fabric and and padding middle layer get cut into 11-inch squares. (Yes, the fabric above is not the bag I actually made this afternoon, but it happened to be the best pic that showed the size difference that I cut. Purple = outside, orange = lining.)
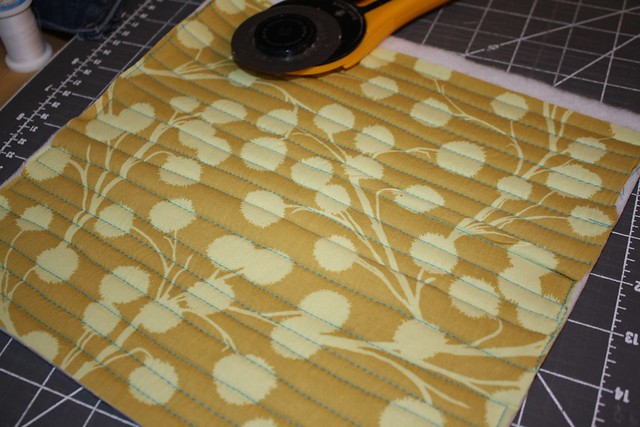
Layer your fabrics with wrong sides together and padding between. The padding and lining fabric are cut larger than the outer fabric in case there is any slipping during sewing. When you have your layers sandwiched together, go ahead and "quilt" your lines. Then you can trim the whole "sandwich" down to a 10-inch square. I sewed my lines slightly wonky and with various widths between for visual interest. But you can be more precise if you want to, it's your bag!
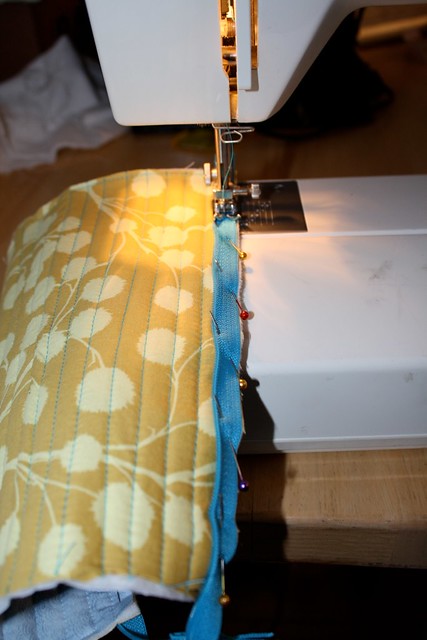
Next unzip your zipper all the way. Pin it onto your fabric sandwich leaving 3/8 inch at the top of your fabric for your seam allowance. Sew on zipper. There will be leftover zipper at the bottom. This is okay! (Unless you bought a metal zipper, then you are on your own.)
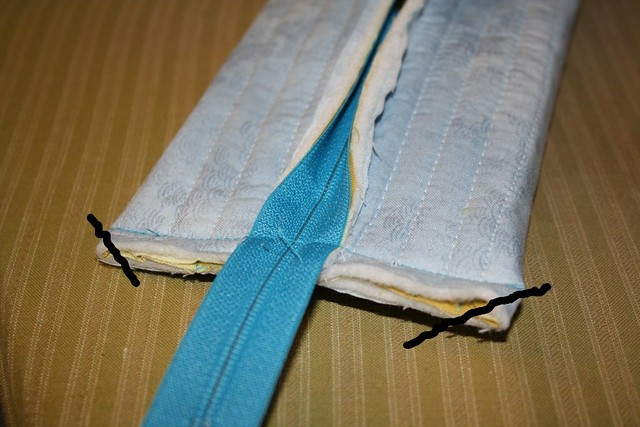
Now go ahead and zip your bag up most of the way, flatten as seen above, and sew each end closed, with a 3/8 inch seam allowance. You can sew right thru the plastic zipper and then cut off the excess, but having extra zipper makes it easy to sew the bag in one piece instead of two. Clip off a little triangle of the extra fabric in each corner, and turn right side out . . . all done! (See the crazy lines I drew on the picture? Cut straighter than that, and don't cut your stitches!)
Can't wait to get the rest of my bags done, and be sure if you make one to show me a pic! Also, this is one of my first tutorials, so let me know if there is anything that needs further clarification for you . . . thanks!
2 comments:
Cute! I think I'll be making one of those soon :)
That comment was mine... not sure why I made it anonymous :/
Post a Comment