Pages

Sunday, September 12, 2010

Insulating the Basement

This weekend John and I undertook a project we have been planning and dreading for some time. Our first real heavy duty house project, not a little light and fluffy decorating project. This one involved sweat, muscles, and POWER TOOLS!

Last winter we ended up closing the den off from the rest of the house because it was soooo cold. You could feel the cold air pour into the house anytime the door to the kitchen was open, so for much of the winter it was a completely non-functional room. Which was a bummer, because it is our hobby room (no kids allowed!) with space for music playing, the computer, and my craft table and supplies.

Hence the decision to insulate the cinder block basement under the den before this winter. And since it's already getting cool, better get it done now!

So we headed to Home Depot and picked up all of our supplies. Except when we started getting them all piled on our cart we realized our 15 pieces of 12 foot long lumber and 19 pieces of 2x8 insulation were NOT going to fit in our Ford Focus Wagon.

You know the Lowe's ad with the couple calling their parents in desperation when they realize they have bitten off more than they can chew? That was us.

Call #1, and John's dad came to the rescue with his truck to drive all of our plunder home.

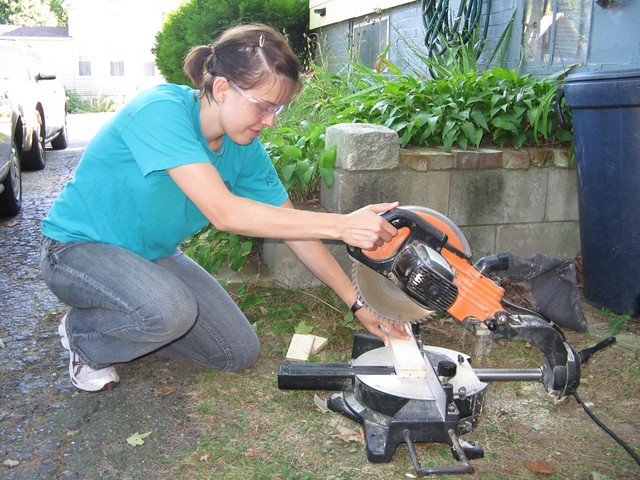
Saturday morning we started off great. I cut the lumber (with a real saw!) while John emptied the basement of all the junk the previous owners left for us. Moldy lumber and such. Yuck. Then I cut down the insulation to the right size while John continued to empty junk. Poor guy kept hitting his head pretty much every time in and out because it is so low!


IMG_5151


IMG_5191

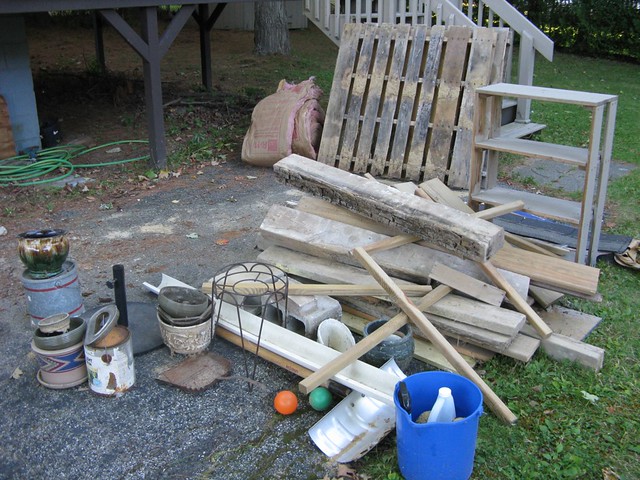
All the junk that will not be going back in the basement.


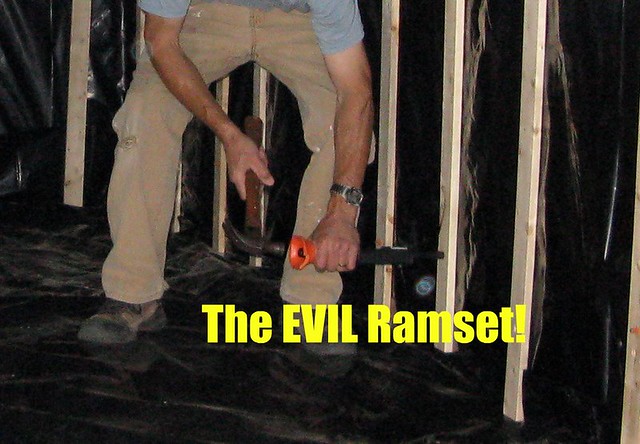
Sophia got up and she and John headed to Starbucks to get fueled up while I read the Ramset manual.

Now, a word of explanation here. And I am not an expert, so it might not even all be accurate. A Ramset is basically a gun that shoots nails into concrete. And uses .22 shells to shoot them. The manual itself is a bit terrifying, with all kinds of dire warnings, apparently you are supposed to have a license to use this thing which you receive after you pass the test that you mail into Ramset. It seems that if you aren't careful, you'll shoot a hole in your foot, or head, or thru your wall, etc.

Once you get past all the warnings and onto the how-to's, it seem pretty straightforward. We did have to make call #2 to my dad to clarify several of the dire warnings (he was the one to recommend this devilish tool to us), and then had to go back to Home Depot to pick up some less powerful .22 casings.

Then we ate lunch, put the kid down for her afternoon nap, ready to go!

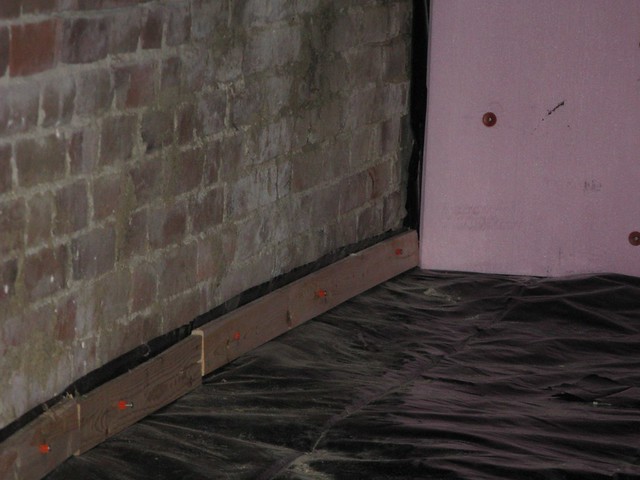
We got the plastic sheeting laid out that we used as vapor barrier on the walls and floor, and put up the first piece of strapping to be nailed to the wall. The plan was to attach the strapping to the concrete blocks with the nails shot in by the Ramset. So we put on our ear and eye protection, loaded up the Ramset, got it in place, hit the trigger on the end with the hammer, and . . .

Nothing happened.

So, as the manual says, we held the Ramset in place for 30 seconds (so no one gets a nail in the brain from accidental discharge), unloaded, reloaded, tried again.

No go.

I decided John wasn't hitting it hard enough, so pushed him out of the way so I could do it right. Ha! Both of us were just frightened enough and just innacurate enough in our hammer strikes that we couldn't make it work! If only we had gotten the next Ramset model up with a trigger instead of the stupid manual one.

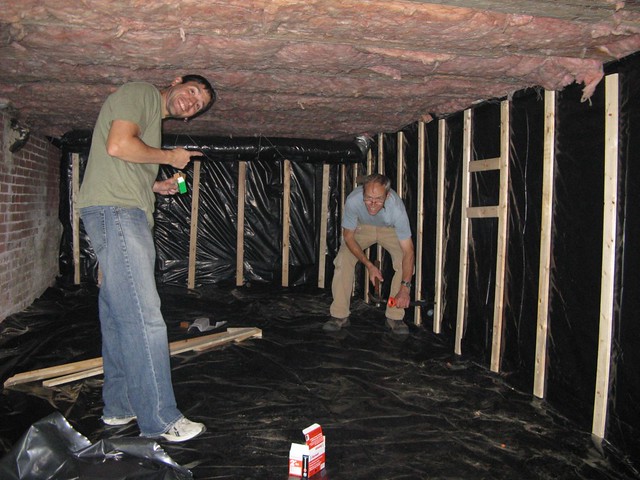
Calls #3 and 4 happened pretty close together, and by the time Dad picked up #4 he was already driving to our house. Two hours later all the strapping was attached to the walls by my dad, who wielded the hammer with considerably more power and finesse than did John or I. John loaded the Ramset while I was the runner, making sure the plastic and strapping where all in place.

I hammered the insulation in place after Dad left, but with regular nails, no .22 shells required. Hopefully it does the trick this winter, and perhaps I will add "remedial hammering practice" to my list of to-do's.


Before:

IMG_5148


During:

IMG_5150


IMG_5150


After:

IMG_5188


IMG_5190

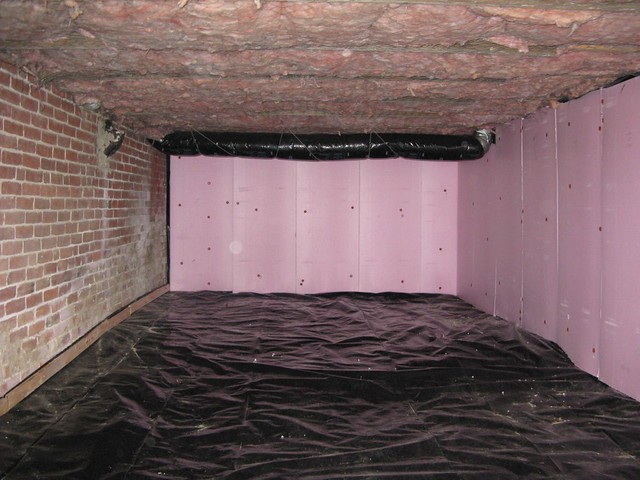
We didn't insulate the brick wall because the other side is our full basement, which stays a pretty good temperature all winter.


IMG_5196

I needed a shower in a bad way by the end of the day . . . but was really pleased overall.

Despite needing some help, we successfully finished our first big home improvement project, and even better . . . did it without fighting!

Now that is a successful home improvement project!

Thanks, Mom!

Those of you who know me even a little know that I have a passion for decorating. There isn't much that is more fun to me than planning out and executing a house-beautifying project. Thank God my husband is supportive of these proclivities! But also, thanks to my mother, from whom I got my decorating genes.

My mom is the queen of turning a little into a lot, decor wise. The things she can do with a can of paint are amazing! Although we tease her about the constant rearranging that goes on in the Munsell house, growing up in that house is what gave me any skills in that realm.

And now I have "inherited" the mother lode!

My mom decided to get rid of a ginormous stack of decorating books, and I got first dibs. I'll take them all, thank you very much!!! Hence, I am the proud new owner of this bunch of books:

IMG_5201

So now if you are ever in need of some decorating ideas, stop by the Libby Library and pick out a book or two to borrow for inspiration!

The Five Minute Centerpiece by Jane Newdick
Home Comforts: The Art and Science of Keeping House by Cheryl Mendelson
Better Homes and Gardens New Decorating Book (2003)
Better Homes and Gardens Easy Decorating Makeovers
Better Homes and Gardens New Decorating Book (1997)
This Old House: Restoring, Rehabilitating, and Renovating and Older House by Bob Villa
One-of-a-Kind Decorating Projects by Christopher Lowell
If You Can Dream It, You Can Do It by Christopher Lowell
Seven Layers of Design by Christopher Lowell
Farmhouses: Stylish Decorating Ideas for the Classic American Home by Marie Hueston
House Beautiful: Bedrooms
Better Homes and Gardens New Decorating Book (1981, but surprisingly some good stuff . . .)
Candace Olson on Design: Inspiration and Ideas for Your Home
The Essential Guide to Paint and Color
Interior Transformations by Ann Grafton
Martha Stewart's New Old House
Great American Wreaths by Martha Stewart
Better Homes and Gardens Porches and Sunrooms
Better Homes and Gardens Decorating Small Spaces
Flea Market Makeovers: 25 Projects for Fabulous Home Furnishings by BJ Berti
House Beautiful: 750 Designer Secrets (Exclusive Design Ideas from the Pros)
House and Garden's Best in Decoration

Wednesday, September 8, 2010

All things baby

Today's post is topic #1, cute baby. Sophia has been moving around more and more, and as many of you know, she started pulling herself to stand while we were on vacation. While she won't do it to command (Of course not, when I want to show off how big she is she refuses!) I can catch a view of this new skill many times a day.

IMG_5054

What a big girl!

Of course, when she gets tired she has to figure out how to get down, and my favorite method is the split. Those little legs get further and further apart, and then she seems to think that she is still too high off the ground to sit and she starts to frantically clutch at the couch.

IMG_5055

Look closely and you can see that she is even trying to hold on with her toes! And just so ya'll (You're contagious, Carrie!) don't think I am a mean mama, I'm pretty sure I rescued her when I was done taking pictures.

Another first:

IMG_5062

Of course, it's still hard work to keep that barrette in, but cute, huh?

Yesterday after nap was picnic time. Sophia and I headed out to the yard with a blanket, banana, yogurt, and graham crackers. The graham crackers were the big hit, once she saw those the banana and yogurt weren't very exciting.

IMG_5069


IMG_5072


IMG_5075

I love this cute little (big) cloth diaper bum!

This last picture isn't great quality itself, but what it captures is priceless. Sophia is such a quiet, stoic, somber baby when we are out and about, but this proves it: she laughs! John caught her mid-laugh, what a beautiful moment . . .

IMG_5044

Tuesday, September 7, 2010

All things decorating

I guess by now you know that my blog is about one third cute kid and another third projects around the house and the last third whatever random topic I decide to blog about. Today's post is #2, projects around the house.

Our dining room chairs were a motley crew. Four of them are a pretty traditional set, given to us by John's parents when we had a table but no chairs. The other two were picked up on the side of the road (thank you across-the-road-neighbors!), are much more contemporary, and very different fabric from the other four. In fact, those two didn't even match each other fabric-wise.

Perhaps if we had loads of money at our disposal, we would just chuck all the chairs out by the road and start from scratch . . . but loads of money, no way! And that would be a mistake anyway, because they are all quality chairs. Time to paint and re-cover!

Re-using items you already have cuts way down on costs. We have a brand new look for our 6 dining room chairs for less than $30. I found the fabric at the Fabric Warehouse and bought the last two and a half yards off their "Buy by the pound" rack, and got a quart of paint from Home Depot. Voila!

Before:

IMG_5010


IMG_5011

After:

IMG_5096

IMG_5093

Thanks to my dad for the use of his battery powered staple gun!


And one more photo, while at Home Depot I picked up another can of spray paint . . . "Hammered Brown" . . . now I am happy with this wall.

IMG_5091
Related Posts Plugin for WordPress, Blogger...