
Octoberish Sophia and I were out for a walk, and happened by a yard sale up the road. The lady had a bunch of picture frames, all sizes and shapes, but wanted more than I was willing to spend. I told her I would be back the next day at the end of her sale.
Next day came, Phia and I headed back to the sale late afternoon, and lo and behold, she gave us 14 frames for FREE!!!
From there I needed to spray paint them all a uniform color. Note to anyone attempting this, don't spray them in the basement near the furnace when the heat is on so that the fumes go up via the vents into the entire house.
Having learned my lesson I waited for spring to come, so I could safely spray the frames a nice uniform black, OUTSIDE.
Late April I got a few coats of paint on my chosen 13 frames, picked pictures, ordered them from Wally World, and framed them. Now, that last sentence sounds practically glib compared to the blood, sweat, and tears that actually went into the process. A "blueprint" was involved, showing which pictures I anticipated hanging and in which frames, so that I could order the right photo, in the right size, for the right frame, in the right layout (portrait or landscape). Whew!
(Note for fellow budget-conscious decorators out there, instead of doing custom matting, I just used white posterboard, cut on my own papercutter, behind each photo. Looks just as good to my eyes.)
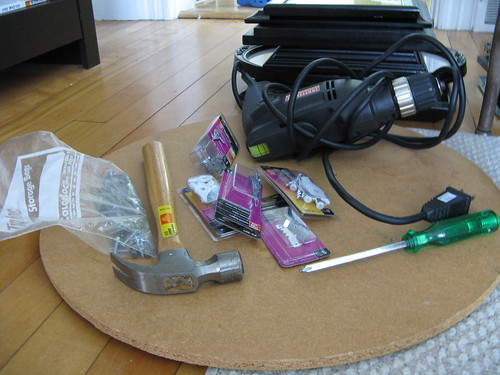
Finally I had all my ducks in a row . . . pictures framed, tools at the ready (including a power drill! and special screws for plaster walls), and lots of determination.
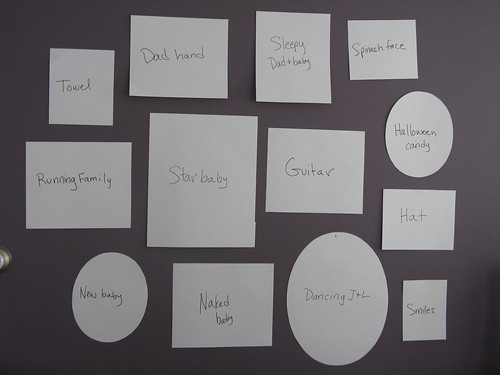

Step 1: hang the paper cutouts corresponding to my pictures. Rearrange. Rearrange again. Try different amounts of space between picture frames. Rearrange once more.
Step 2: drill 31 holes in the plaster wall while attempting to hang 13 pictures, because it turns out that 1 3/4 inches is not the right distance between them, and 3 inches is not either. So much for my paper trial run. Turns out 2 1/2 inches apart is just right. (Goldilocks, anyone?) Putty up the 18 leftover holes, wait for it to dry, sand smooth, paint. And paint again. Clean lots of plaster dust off the floor, furniture, myself, etc.
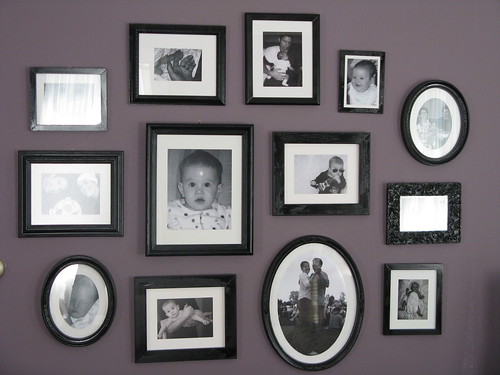
Step 3: At last, when the last bit of paint is dry, hang up the pictures!!!
In the end I was so happy with the results I was glad I didn't just leave them 1 3/4 inches apart as I was tempted to. It was worth the extra work to make sure I really liked how it looked.
Without any further ado, here's my photo wall!
6 comments:
GORGEOUS!
Kudos to you for repairing the wall holes...looks wicked good!
Wow, when are you coming to my house to do this for me? :)
And yes, kudos to you for repairing the holes. I would have been tempted to just hang the frames right over top and never mention what had happened! Ha! :) It looks GREAT!
Looks great Laurel!!
Thanks, ladies! Beth, I was SOOO tempted to leave the holes as is, at least the covered ones. I just had super energy that day or something, so I could power thru it. Now it's gone again . . .
True confession time...I have left many, many holes unfilled under strategically and, oh, so artfully arranged frames! (Blush)
Post a Comment